Friday, 1 January 2016

Evaluation of Rough Cut 1

I believe that our group's rough cut of our title sequence was successful as a whole. As we decided to do a discrete opening, the order of the shots made sense, even though they were not in the exact order that we had intended due to finding more locations whilst out filming.

The camera work in my opinion was okay. We used many different shots and used the tripod as different stages of filming. However, some of the footage that we shot was really shaky due to the very cold weather - to solve this we cut down the footage during editing so that it wasn't as noticeable. 

We used a variety of shots in order to portray our genre and ones that we thought would help allow us to create tension in our film opening. The shots included 
Wide shots
Close ups
Over the shoulder shots
Extreme close ups
Panned shots
Low angle shots


For a few of the scenes we used lights which we borrowed from college as we were filming in many different dark locations. However, we had to use the lights on our phones to spotlight the character and his surroundings as the power was out. There were other times in which we didn't use the lights as it would ruin the natural light and its affect, such as in the Greenwich Foot Tunnel.

We only had two characters in our film opening, one of the reasons for this decision was that our opening was discrete. One character was played by my friend; however the role role was played through photographs of her. The character of the stalker was played by different people due to the original person not being able to shoot all the time. As the stalkers' costume was black clothing, and their face was never revealed, different people were able to play it without any viewers noticing.

I feel as if we used the Mise-en-scene well during our opening which really allowed to achieve our genre of Thriller/Horror. The use of the grave yard and Greenwich Foot Tunnel really added to that. I also think the use of costumes and props really added to this too.


Wednesday, 23 December 2015

SWOT Analysis

Looking back at my previous blogs, I have noticed that a number of them needs to be improved and that I have both weaknesses and strengths.

Strengths 
- A lot of research into Thriller movies and into the target audience
-  Detailed blogs, explaining exactly what needs to be done (production)
- My blog posts do not look messy


Weaknesses
- Not enough multi media in blog posts
- I have quite a few unfinished blogs which I need to complete so that I do not get left behind on current blog posts.
- Time management between work from all different subjects


Threats
- I find it hard finding the right GIFS to use, as I imagine what I want my blog posts to look like in my head before starting one


Opportunities
- I really like filming as it's helping me develop my camera skills and my confidence is boosting every time I use the camera

Evidence Audit Task

Saturday, 12 December 2015

Rough Cut 2 Feedback

ROUGH CUT 2 FEEDBACK

Today we completed our rough cut 2 and presented it to our class. They gave us feedback on what they liked and what they thought we could do to improve.

To improve they said we should:

- Put the distributor title before the production title.

- Take out the ':' in the titles as it wasn't consistent throughout the opening.

- Lighten the ashtray shots a little bit as some people thought it wasn't clear enough.

- Add sound to the blank screen towards the end as the students in our class thought it that our film had ended, but we had more shots to come.

- Some of the credits need to be on the screen a bit longer, to give the audience more time to read them. The lack of time also links to the effect as it makes the credits flash on and off the screen.

- They also said that we need more layers of sound. We were already aware of this and have scheduled to record some sounds over the weekend ready for our next editing session on Monday.

We will take all of the comments on board and we will do everything we can in order to improve our opening title sequence.

What they liked:

- The class liked our soundtrack and how the shots was in time with some of the sound.

- People also liked our opening in general and our teacher said : 'it's excellent, not good, excellent'           

Friday, 11 December 2015

Rough Cut 2


OUR ROUGH CUT 2 WHICH WE PRODUCED IN TODAY'S LESSON.
SINCE ROUGH CUT 1 FEEDBACK WE WERE WORKING ON TITLES AND ADDITIONAL SHOTS. HOWEVER IT STILL NEED LOTS OF IMPROVEMENT.


Thursday, 10 December 2015

Evaluation of rough cut


The success of the title sequence 

The type of title sequence that we 
choose to use was a discrete title sequence. This is used to create a mood and an atmosphere for the whole film. The order of the shots that were used all made sense in the way that they were put together. As the title sequence is discrete the title sequence consisted of lots of different shots setting the scene for the movie. The order of the shots also makes sense as I think that the audience see's how the villain is as we portrayed the villain as quite sinister in the title sequence. For this we used creepy dolls and minimal light as these are all connotations of something or someone being sinister. However, we did use some elements of a narrative style title sequence in the ending as we thought that the audience would understand.a bit more of what they have previously watched.

The order of the title sequence was not how we planned it as the amount of footage and locations that we originally planned to do had changed slightly. We had lots of footage to narrow down and put into a specific order. We tried to match how the scenes came on scene with the music to add a jumpy effect as our genre was thriller. Putting the title sequences in order was quite difficult as our footage consisted of many different location shots of different places ranging from light to dim lighting so we tried to make the footage coincide with the next scene as best we could. In addition to this we added a couple of gaps to the title sequence as some of the scenes would not work next to each other. I think this added to the jumpy effect as we took inspiration from our remake seven and how successful the gaps were there.

The quality of the camera work

The camera work we used a range of different shots to create different effects ranging from extreme close ups to establishing shots. We used a tripod so the camera was steady as in my prelim I didn't use a tripod and there was shakes and wobbles in the video which didn't look great.

The variety of shot types used

The camera shots we used were:

Establishing shots- to establish and describe what kind of of environment the villain likes to hang around in. This was evident in the tunnel and graveyard scene .

Close up shots: used to show the detail of a certain object which will be significant in the film later on. This is evident in the candle scene and the picture scene.

Extreme close up: this was used to show an extremely significant part of the film. This was evident when Cassie woods was on her phone (victim) and she accepted the friend request from jj josh (villain). 
Over the shoulder shot: which was used to create a sinister mood and atmosphere as you were only able to see a black hoodie. This is evident in the Scene with the villain having his back to the camera.
Panning shot: we used a panning shot to show all of the graffiti and the different types of graffiti there was on the wall.

The use of lighting

We had some artificial lighting already in the tunnel when we were filming and the artificial lighting had a yellow hue to it which made the tunnel look dingy and dirty which added to the villains overall personality that was portrayed in the film (sketchy). We also used natural lighting when filming the scenes near the canal as it was already bright. We also used some of our own artificial lighting in the graveyard scene and the scenes with the villain as it was dark and we needed to enhance what the camera was picking up. We had a mixture of light and dark scenes with the dark scenes based in the middle of the title sequence and it blended well with the light scenes also. 

The performance of the characters 

We didn't have many characters in the title opening and they were mainly masked as we wanted to keep the identity secret to add to the convention of the thriller genre. However there was a change of characters between scene as the original stalker wasn't available after the scene that we shot, we solved this by getting someone else to fill in as the villain is wearing a black hoodie for the most part of the film so it wasn't really a set back. 

The use of mise-en-scene:

The locations we used were mostly public. 
We used:
The Greenwich foot path: 

Camden (graffiti walls and canal) 
The graveyard: 

A street: 
These locations were especially choose. As they were really dirty and we thought that the would have the perfect atmosphere for our title sequence especially the foot path. 
We also used some personal locations like: 
Monika's shed:
Abi's attic: 

There were also a lot of props that we used to get our desired effect. 
Candles: 

Polaroid pictures:

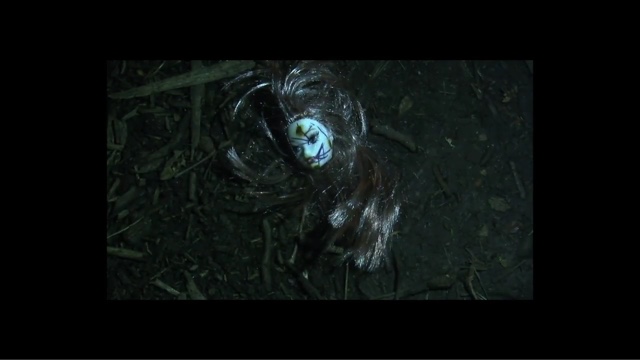
Doll heads:

Cigarette tray containing cigarettes:

Laptop screen:
Phone screen: 

Matches:

The main costume that was scene throughout the film was the signature black hoodie to hide the villains identity 
There was also black gloves again to do the same thing. 


Rough Cut Feedback

FEEDBACK SESSION 


We shared our rough cut openings in class and gave each other feedback. The one we got was the fact that some shots we used were light and then they were followed by dark ones which contrasted a bit. We will consider changing the order of some shots to make the smooth transition from one shot to another. Also. some people were unsure whenever the victim accepted the friend request and what will happen to her, so we decided to introduce Cassie character by recording some more shots where she's walking out of her house in order to make a clear narrative entrance into the movie.